Showing posts with label Love. Show all posts

9.05.2017

RC Sneak Peek Day 1 - Sending Monster Hugs


Hello! It's the first day of Reverse Confetti September sneak peeks, and today I'm sharing a card created using the new Monsterous stamp set, the Boo to You Circle Confetti Cuts and Wonky Stripe Panel Confetti Cuts dies, and my newest 6x6 patterned paper pad, Every Little Bit. :)

To create my card, I started by first creating a Stone card base and adhering a small strip of striped patterned paper from the Warm Hearts paper pad.  I then die cut a piece of Cloud White cardstock using the Wonky Stripe Panel Confetti Cuts and backed it with one of the patterns from the Every Little Bit paper pad.  Next, I stamped one of the monsters from Monsterous in Versafine black ink onto watercolor paper, and heat set it with clear embossing powder before coloring it with Zig Clean Color markers.  


While the image was drying, I then die cut the large scalloped circle using Lime Green cardstock, the white circle using Cloud White cardstock, and the Boo to You Confetti Cuts.  The two die cuts were adhered together, and then the sentiment from Monsterous was stamped in black ink.  Once the monster image was dry, it was die cut using the Monsterous Confetti Cuts dies.  To finish up, the polka dot panel was adhered to the card base, the scalloped circle was adhered with foam tape & I embellished with purple enamel dots.


Would you like to be entered for your chance to win one of two gift certificates to RC (one for blog commenters, and one for Facebook commenters)? To enter, simply leave comments on the RC DT blogs, then hop on over to the Reverse Confetti Facebook page. (Full details can be found over on the RC Blog.)

Have a great one!

8.24.2017

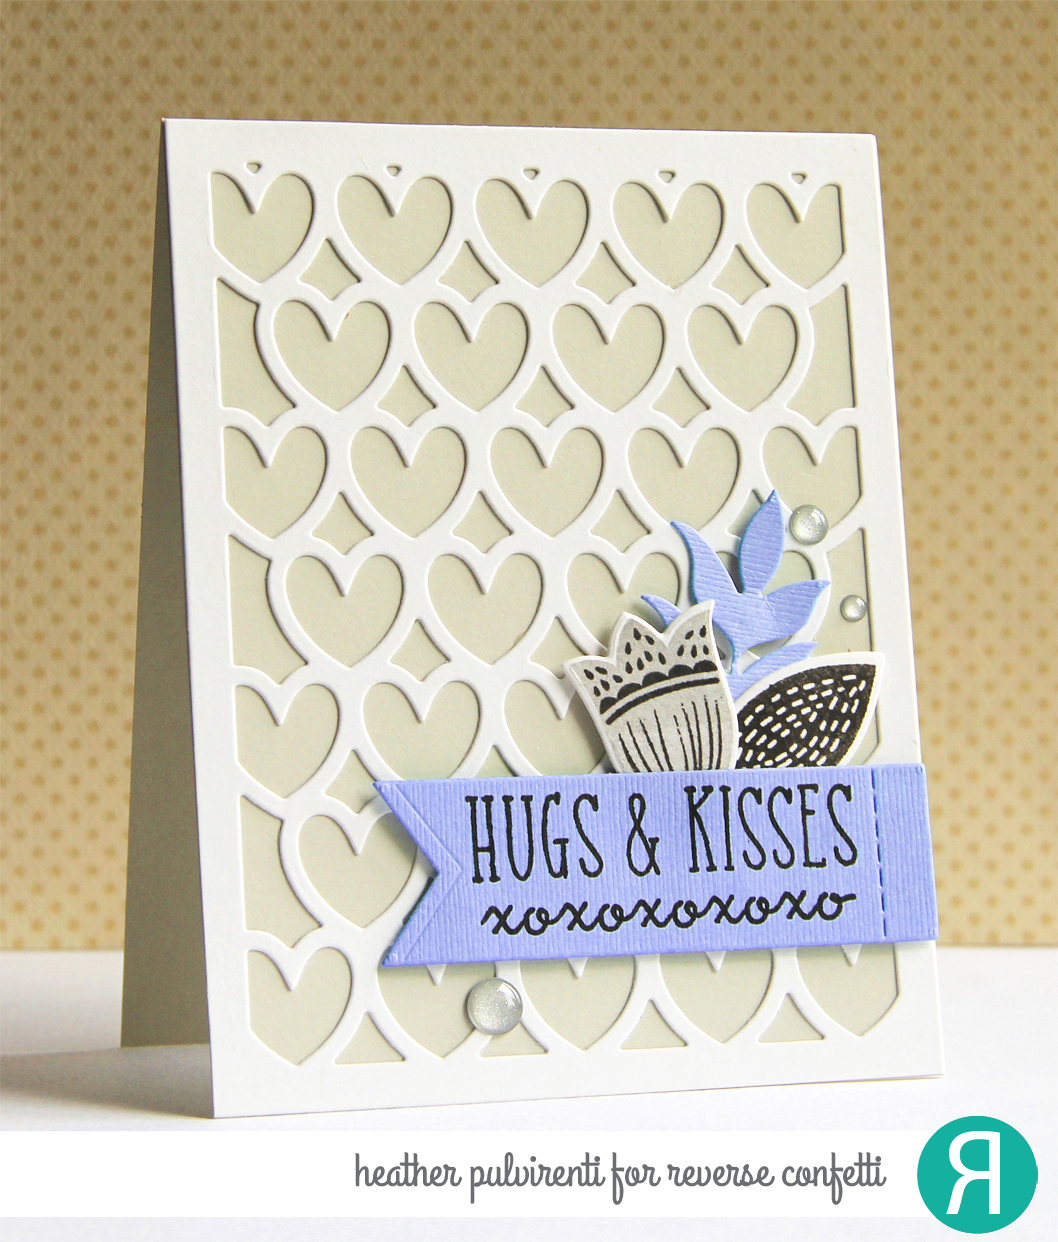
Hugs & Kisses - XOXO


Hello! Just popping in to share a card I created that's a CASE of a card I made way back in January... :) 

To create my card, I first die-cut a heart background using the All Heart Cover Panel Confetti Cuts on Cloud White card stock and adhered it to a Stone card base. I then die-cut a banner for my sentiment using Bazzill cardstock, and stamped it with two sentiments from Reverse Confetti's Crazy About You stamp set in Versafine ink.


The flower and leaf images from the Blooms ‘n Buds stamp set were stamped in gray and black ink, then cut out with the coordinating Blooms 'n Buds Confetti Cuts. Next, I die-cut a leaf silhouette using the Wheat Confetti Cuts and adhered a simple flower bouquet together.  To finish up, I adhered the sentiment and floral bouquet to the card with foam tape, then embellished with silver enamel dots.


Have a great one!

3.05.2017

RC Sneak Peek Day 1 - Wild About You


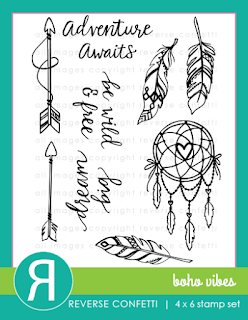
Hello! It's the first day of Reverse Confetti March sneak peeks, and today I'm sharing a card created using the new Boho Vibes stamp set, and the Tall Triangles Confetti Cuts and Wild Words Confetti Cuts dies.

To create my card, I started by first die cutting several Tall Triangles Confetti Cuts from Stormy, Stone and Cloud White cardstock.  I then created a pattern with the individual chevron pieces and adhered them to a Lead card base.  Next, I stamped the feather images from Boho Vibes in Stormy ink onto Stone cardstock, then cut them out with the coordinating Boho Vibes Confetti Cuts.  


The focal sentiment was die cut using the Wild Word Confetti Cuts on Iced Aqua cardstock, and adhered to the front of the feather die cuts.  The remainder of the sentiment was created by stamping letters from the Alphabetical stamp set in Stormy ink onto white CS.  To finish up the card, I adhered the sentiment pieces together, attached them to the card front with foam tape, then embellished with matte aqua enamel dots.


Would you like to be entered for your chance to win one of two gift certificates to RC (one for blog commenters, and one for Facebook commenters)? To enter, simply leave comments on the RC DT blogs, then hop on over to the Reverse Confetti Facebook page. (Full details can be found over on the RC Blog.)

Have a great one!

3.01.2017

March SFYTT - Love You More Than Jellybeans


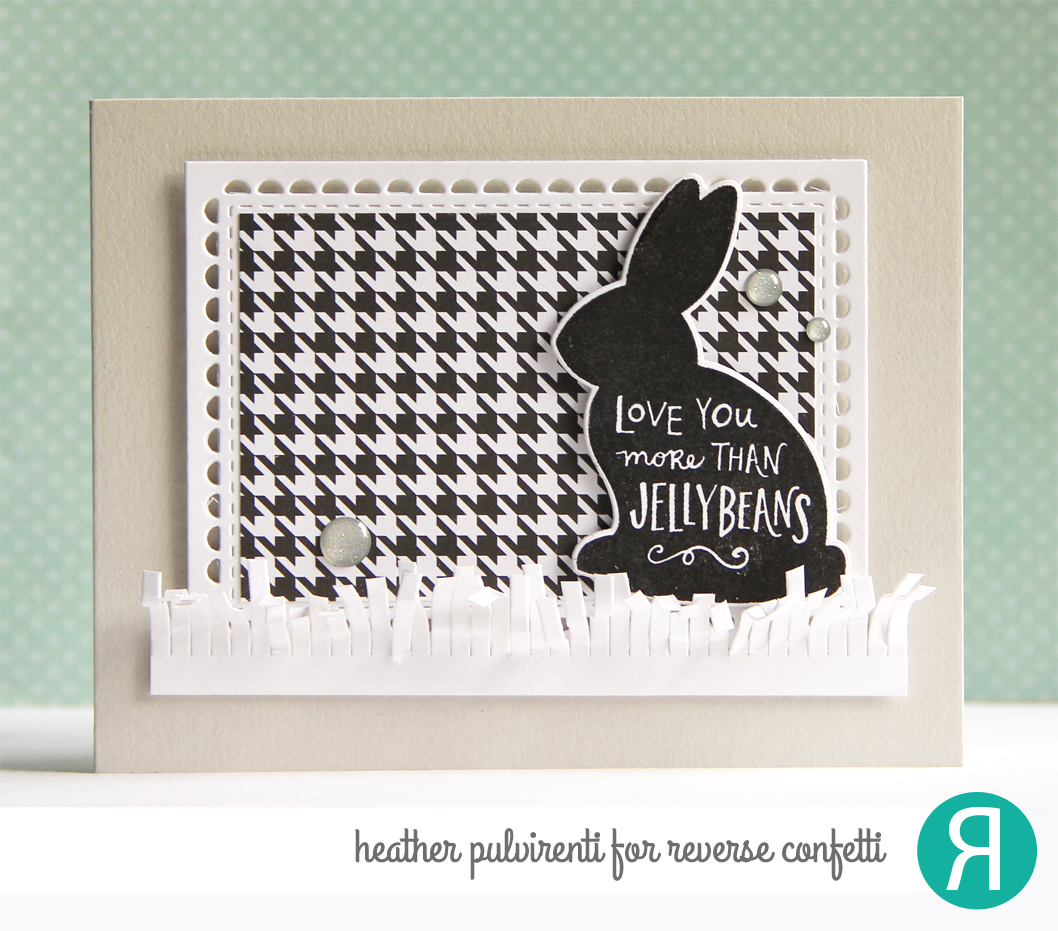
Hello! It's the 1st of the month, which means it's time for a new Reverse Confetti sketch challenge (SFYTT).  This month's sketch is super fun and I can't wait to see what everyone comes up with! :) It was a bit of a challenge for me as a CAS-ish kinda gal, so I stripped it down and flipped it on its side, and this is what I came up with.  It's also not your typical spring color scheme, but I think it's super sweet. :)

To create my card, I started with a Stone card base.  I then used the Lacy Scallop Frame Confetti Cuts on Cloud White cardstock and topped it with a piece of houndstooth patterned paper from my True Love paper pad.  The die cut frame was then adhered to the card front using foam tape.


Next, I stamped one of the bunny images from More Than Jellybeans in black ink onto Cloud White cardstock, cut it out using the coordinating More Than Jellybeans Confetti Cuts and then adhered the bunny to the card front using foam tape.  To finish up, I cut a strip of "grass" from white card stock, scrunched it up a bit, then attached it to the card base before embellishing with silver enamel dots.


Want to play along with us this month and be entered to win a gift certificate to the RC store? Please see the Reverse Confetti blog for full details! :)

Have a great one!

2.10.2017

Lawn Fawn Blog Hop - Be My Valentine


Hello! CardMaker Magazine has teamed up today with Lawn Fawn for a fun blog hop showcasing their products. :) Hopefully you've reached my blog by way of Kat Benjamin's blog, but if you'd like to start at the beginning of the hop, click HERE.

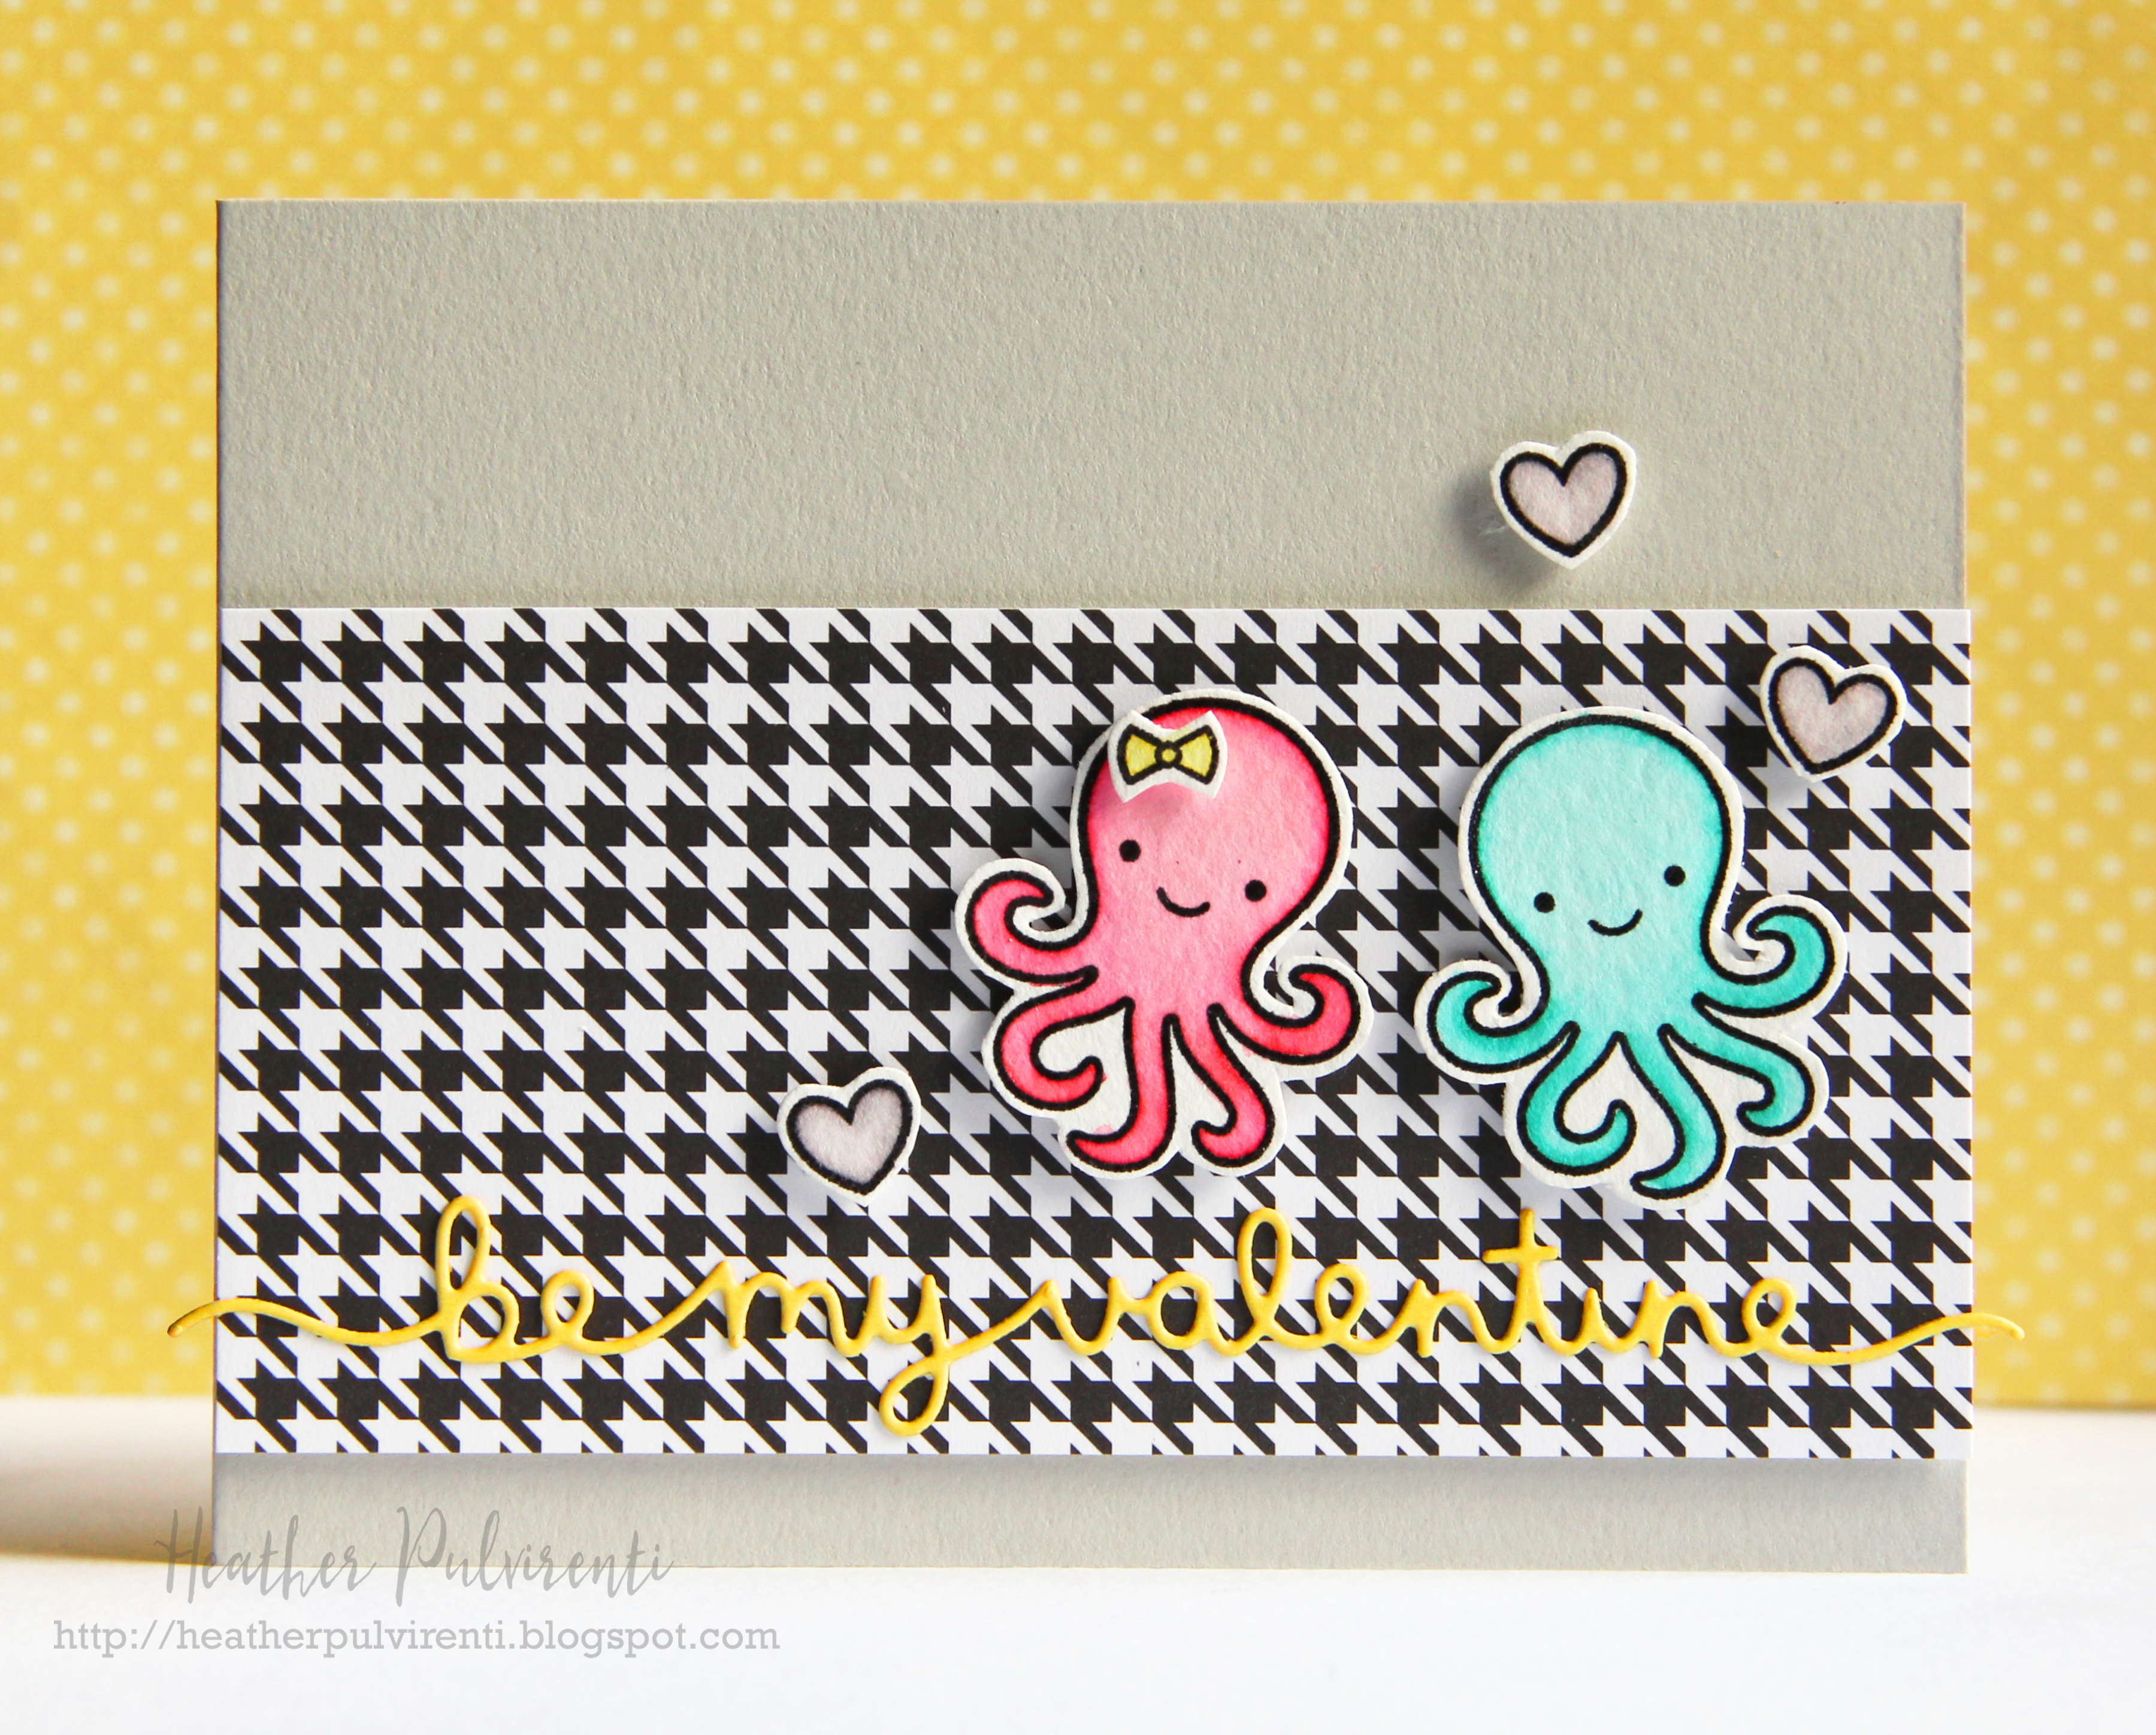
To create my card, I started by first stamping the adorable octopus image from Octopi My Heart in Versafine black ink onto watercolor paper, then heat setting it with clear embossing powder.  I then did the same thing with the coordinating itty bitty bow and the largest heart from the set.  Once I had all my images heat embossed, I colored them with Zig Clean Color watercolor markers.


While I was waiting for the images to dry, I cut a large strip of black and white houndstooth patterned paper, and adhered it to a light gray card base using foam tape.  Next, I die cut a piece of yellow cardstock using the Be My Valentine Border die, and adhered it to the card front.  Once the stamped images were dry, I fussy cut them out (though coordinating dies are available) and adhered them to the card front with foam tape.  Quick, easy, and super cute! :)

Thanks for stopping by today, next up on the hop is Stephanie Gold's blog. (To see the full list of today's participants, please click HERE.)

Have a great one!

2.08.2017

RC Blog Hop - XOXO


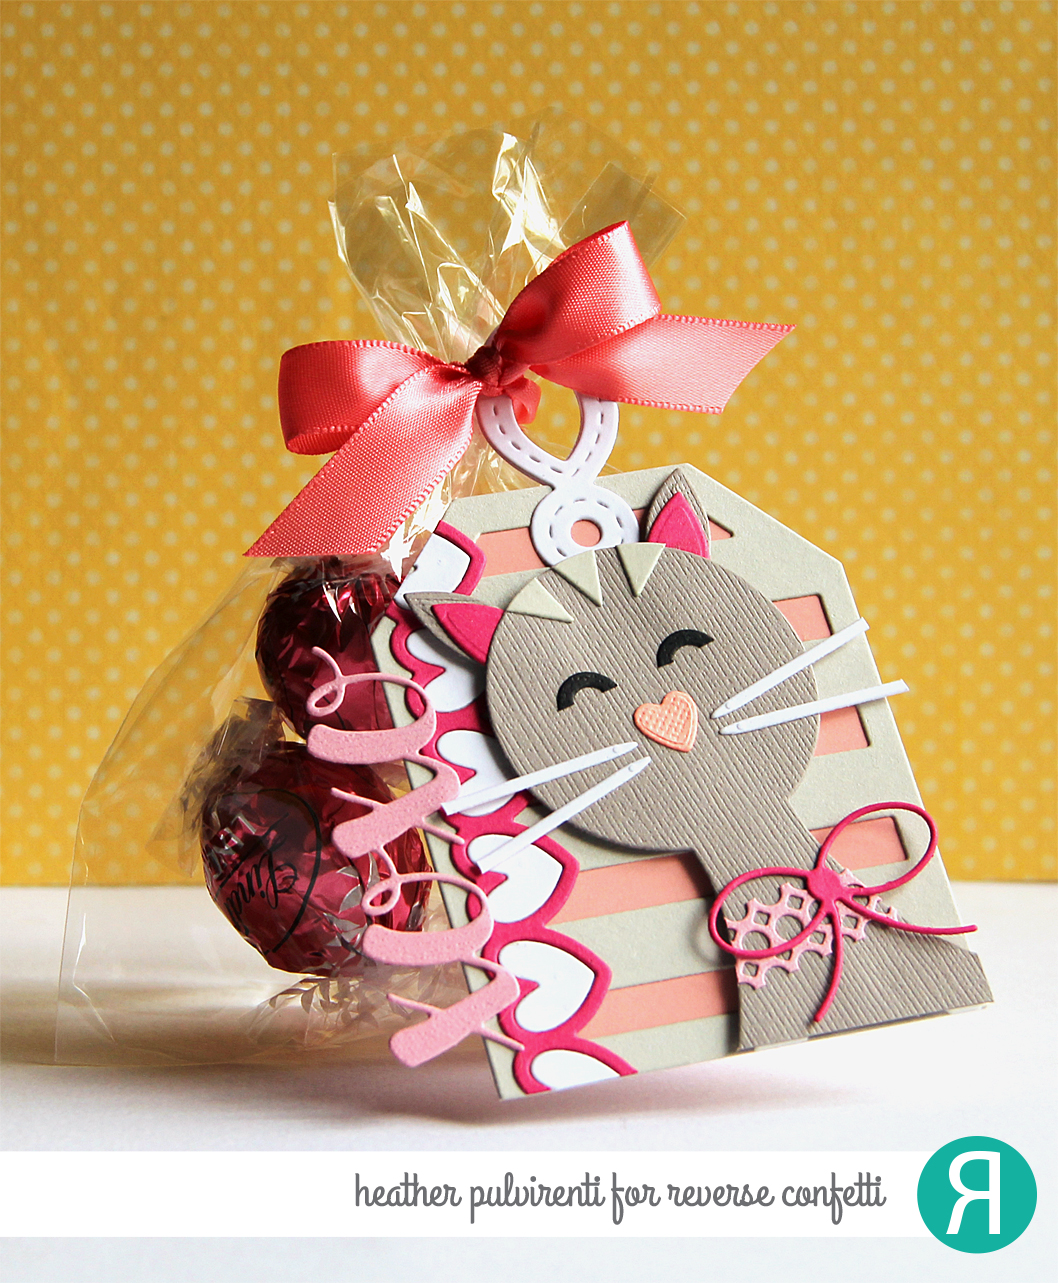
Hello! It's the 8th of the month, which means it's Reverse Confetti blog hop time! :) Since Valentine's Day is just around the corner, I thought it'd be fun to create a little treat and tag combo.  My daughter is obsessed with cats, so I used just about every Confetti Cut known to man to create this little critter! :) Haha... Okay, so I didn't really use *that* many, but I did end up using about 8 different dies to create the kitty for my tag. :)

To create my tag, I first started by die cutting my tag base using the Topped Off Tag Confetti Cuts on coral CS, then topping it with a piece of gray CS die cut with the Big Stripes Tag Layer Confetti Cuts.  I then used the Hang Ups Too Confetti Cuts on a piece of white CS and adhered the die cut to the tag base.  Next, I used the XOXO Hearts Confetti Cuts on white, pink and fuchsia CS to create the heart strip and XOXO sentiment.  The heart strip was attached to the tag front leaving a little room on the left edge to adhere the sentiment.  Once both pieces were attached to the tag, I then went back and glued in all the little white hearts.


Next up, my kitty. :) The cat body was created using the Hanging Out Confetti Cuts on a piece of dark gray textured CS.  I then used the Double Panel Circles Confetti Cuts on light pink CS, trimmed off the top and bottom of the die cut, then adhered it to the cat base to create a collar.  The bow was then die cut using the Tagged Tote Confetti Cuts on fuchsia CS and adhered to the cat.  Next, I started working on die cutting all the pieces for the cat's body and face.  The whiskers were die cut using the Office Edges Confetti Cuts on white CS.  The cat's nose was created by die cutting a heart using the Layered Snowflake Confetti Cuts on coral CS.  The ears were then created using the leaf die from the Flowers for Mom Confetti Cuts on gray and fuchsia CS and adhering the pieces together.  The eyes were created by die cutting the smaller open circle from the Tag Me Confetti Cuts set on black CS.  The furry accent pieces were created using the pumpkin's eyes from the Halloween Bits Confetti Cuts set on light gray CS.  Once all the pieces were die cut, I then assembled them together using adhesive.  To finish up, the cat die cut was adhered to the tag front using foam tape, then attached to the small chocolate gift using a coral satin bow.

Whew! A lot of little steps to create that kitty, but it's so worth it because I just *know* my kiddo is going to love it. :)

Thanks for stopping by today, here's the full list of today's hop participants if you'd like to check out their awesome projects:


Have a great one!

2.01.2017

February SFYTT - Sending You Love


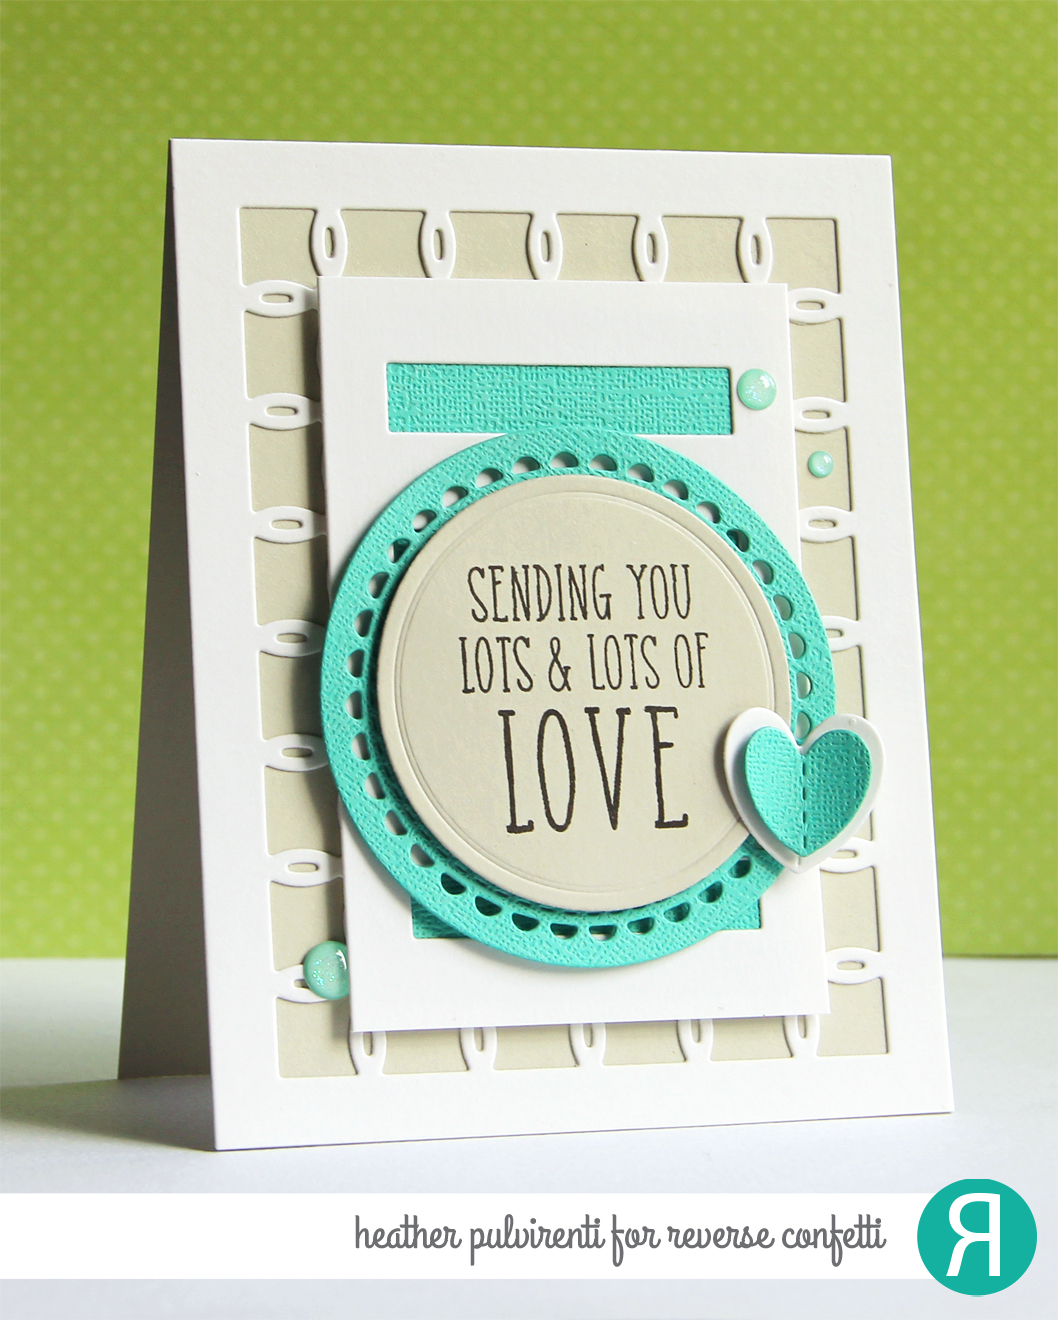
Hello! It's the 1st of the month, which means it's time for a new Reverse Confetti sketch challenge (SFYTT).  This month's sketch was really CAS, and I think it will lend itself to many different interpretations.  I can't wait to see what everyone comes up with! :)

To create my card, I started with a Stone card base, then topped it with a piece of Cloud White cardstock that had been die cut with the Linked Circles Confetti Cuts.  I then used the Tall Stripe Panel Confetti Cuts on a piece of Cloud White cardstock and adhered the die cut to a piece of teal textured cardstock.  


Next, I used the Lacy Scallop Circle Confetti Cuts on teal textured cardstock, and the largest circle from the Circles 'n Scallops Confetti Cuts on Stone cardstock.  The sentiment from Crazy About You was stamped in black ink onto the gray die cut circle before adhering it to the scallop die cut with foam tape.  The circle panel was then adhered to the strip panel layer with foam tape, and attached to the card front with yet more foam tape (are you seeing a trend here? lol).  To finish up, I die cut two hearts using the XOXO Hearts Confetti Cuts dies, foam taped them together, then attached them to the card front with more foam before embellishing with aqua enamel dots.


Want to play along with us this month and be entered to win a gift certificate to the RC store? Please see the Reverse Confetti blog for full details! :)

Have a great one!

1.26.2017

Hugs & Kisses


Hello! I'm posting over on the CardMaker Blog today... For the full write up of my card, please hop on over to their blog post HERE. :)

Have a great one!

1.19.2017

You Are So Very Loved


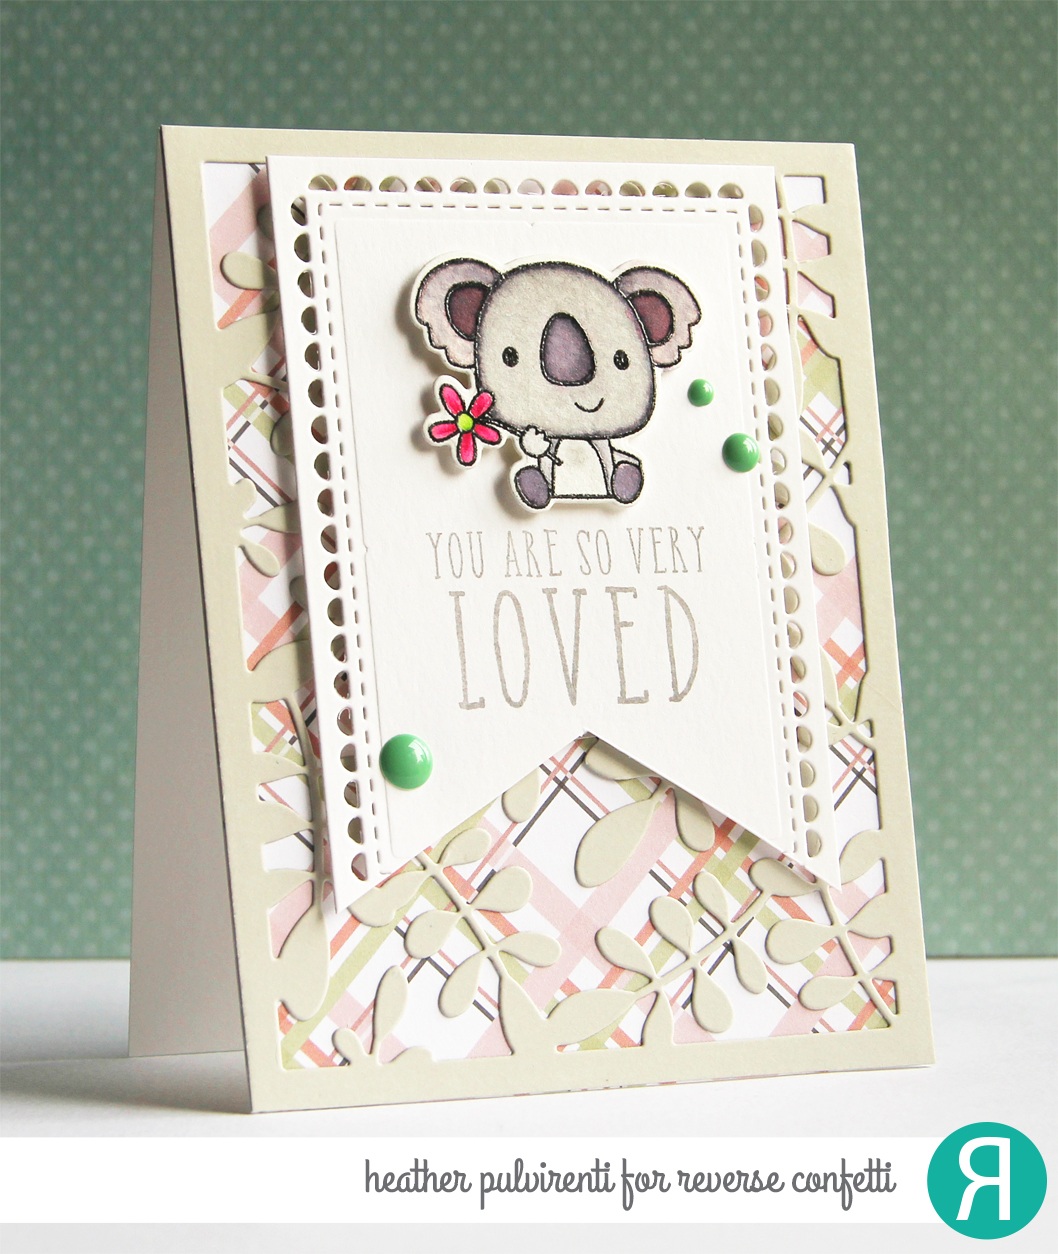
Hello! It's Thursday, which means the weekend is just around the corner... Woot! :) I'm popping in today to share a quick and easy card I created using Reverse Confetti stamps & dies.
To create my card, I first started by stamping one of the koala images from Bear Hugs in Versafine ink onto watercolor paper, then heat set it with clear embossing powder.  I then colored the image with Zig Clean Color watercolor markers and set it aside to dry.  While the image was drying, I trimmed a piece of True Love patterned paper and adhered it to a Cloud White card base.  I then used the Leaves Cover Panel Confetti Cuts on a piece of Stone cardstock, and adhered it to the card front.


Next, I die cut a piece of Cloud White cardstock using one of the Lacy Scallop Frame Confetti Cuts, then trimmed the bottom into a banner shape.  I then stamped one of the sentiments from Crazy About You at the base of the banner.  Once the koala was dry, I cut it out using the Bear Hugs Confetti Cuts.  To finish up, I adhered the stamped panel and koala to the card front using foam tape, then I embellished with green enamel dots.


Have a great one!