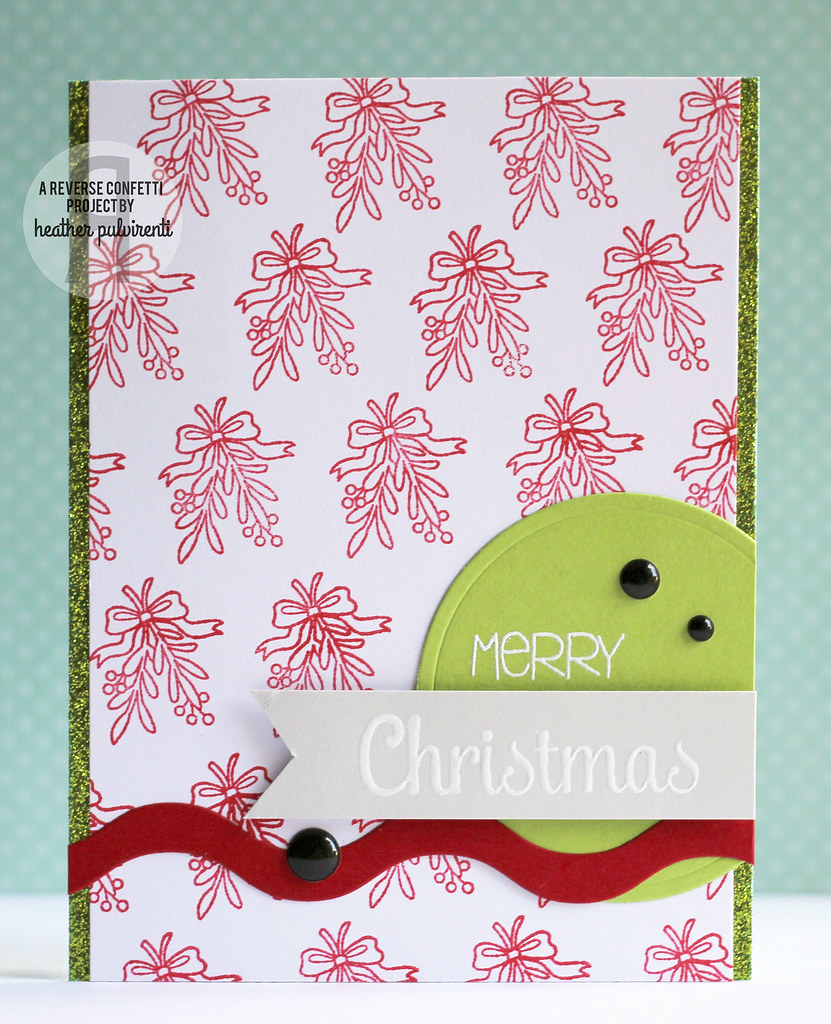
Hello! :) Today is the first of the sneak peek days for the November Reverse Confetti release, and the DT is featuring cards/projects created using the new Quirky Cuties: Marley Moose set.
To create my card, I started with a piece of white CS, and repeat stamped the mistletoe image in red ink to create my patterned paper. I then adhered the stamped layer to a card base covered with green glitter CS. Next, I die cut a circle using the Circles 'n Scallops Confetti Cuts from green CS, and stamped it with Merry before heat embossing with white powder. I then cut a small strip of light gray CS, and stamped it with Christmas from the Bring on the Merry set before heat embossing with white powder.
I adhered the green circle to the card base, and cut off the overhanging edge. I then trimmed the end of the light gray CS into a banner shape, then adhered it to the card base with pop dots. I used the Doin' the Wave Confetti Cuts on a piece of red CS, and adhered it to the card base before embellishing with black enamel dots.
Would you like to be entered for your chance to win a great prize? Head on over to the RC Blog for details!
Have a great one!


Gorgeous love the mistletoe background <3
ReplyDeleteHeather, love this. Mmmmm, my eye loves that green circle and wavy cut. Thanks for showing a nice simple background using the Marley Moose set.
ReplyDeleteWell that is a great background!
ReplyDeleteLove the patterned paper you created with the mistletoe!
ReplyDeleteLove how you made the background, very cute!
ReplyDeletelovelovelove your stamping.
ReplyDeletefestive and fun! TFS!
ReplyDeleteLove this bright beautiful card!
ReplyDeleteSweet combination of RC elements! Love your creativity!
ReplyDeleteGreat use of the stamp to create a background - like all the details on this card. Thanks
ReplyDeleteI like how you have repeated the pattern to create your own background paper, which coordinates really well with the green too.
ReplyDeleteThis is totally cool and classy!! What a great card design!!
ReplyDeleteThis is so pretty, Heather! I love how you used the mistletoe stamp to create the background!!
ReplyDeleteLove the way you used the mistletoe stamp to create a background! I'm so glad to see this because it's another way to use the stamp that I wouldn't have thought of doing!!!!
ReplyDeleteI just adore this! Such perfect details - a bit a sparkle, a few enamel dots - perfection!
ReplyDeleteI like the way you created the background! Nice!
ReplyDeleteBeautiful! Love your stamped background!!!!!!!!!!
ReplyDeleteDeanne :)
I love the background and the colors! Thanks for the inspiration!
ReplyDeleteGreat idea making your own background paper. Very pretty. Bright and colorful.
ReplyDeletethanks for sharing.
Love how you did the background.
ReplyDeleteI like how you created your own background...very nice design.
ReplyDeleteMistletoe paper... you rock, Heather! Love the colors you've chosen here...
ReplyDelete=] Michele
Simple but beautiful.
ReplyDeleteVery neat. love the use of the wave die!! very fun!
ReplyDeleteI love that you made your own patterned paper! I love that image to this set. I love the simplicity of your card!
ReplyDeleteBeautiful traditional colours on your pretty card
ReplyDeleteFantastic background stamping!
ReplyDeleteI love lime green and red for Christmas! Cute card!
ReplyDeleteFun holiday card! Great example of the versatility of this stamp set!!
ReplyDeleteLove how you created you own background. Lovely card!
ReplyDeleteGreat background stamping! Awesome!
ReplyDeleteIt's so nice to see how just one element from a stamp set can be used to make a beautiful card. Stunning!
ReplyDeleteVery Christmassy. Thanks for the tip on creating a background with the moostletoe stamp.
ReplyDeleteGreat background for this Christmas card.
ReplyDeleteBEAUTIFUL card Heather!!!
ReplyDeleteLOVE your mistletoe background and elegant design!!!
Beautiful and classic Christmas!
ReplyDelete